I hope you are as exited for fall as me. If you are keep reading. Just to get in the mood I decided to make a list of all the things we love about autumn.
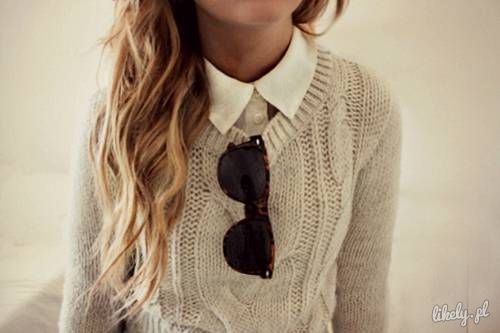
Sweater Weather
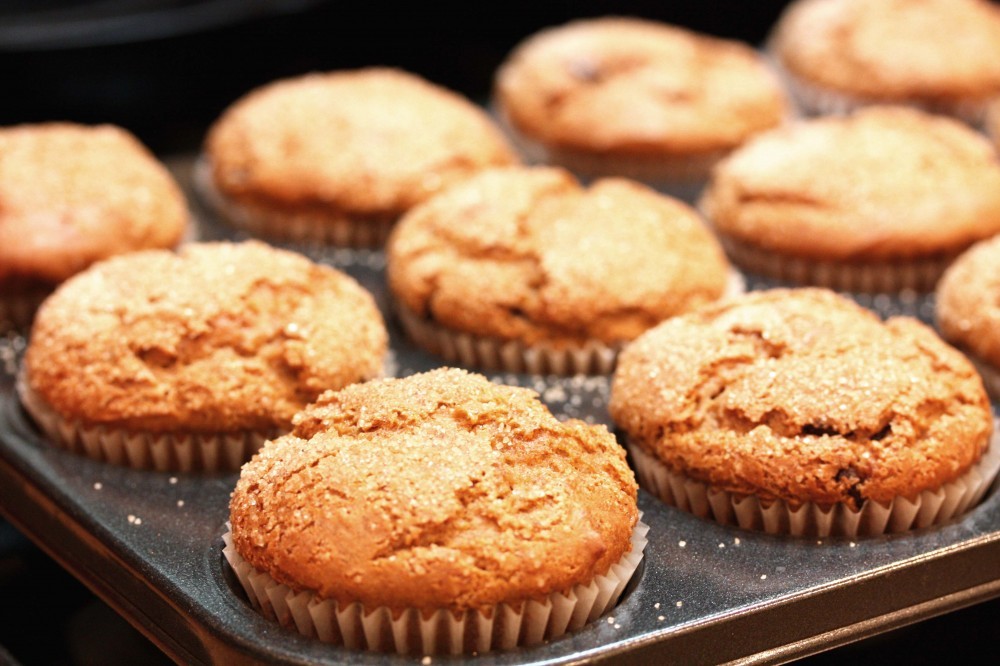
Baking
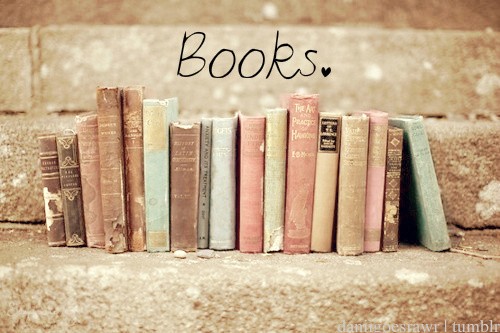
Books

Hot Chocolate

Crunchy Leaves

Festivity and Pumpkins
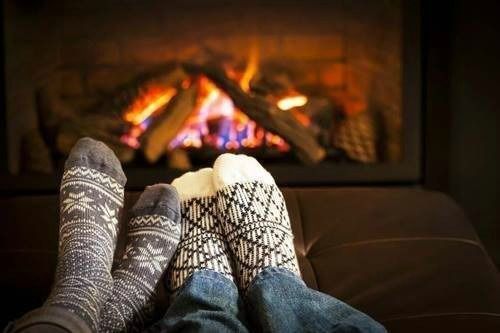
Fuzzy Socks
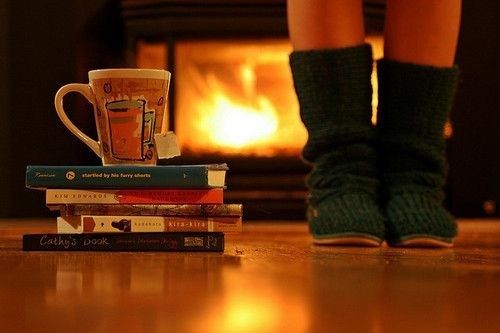
Fire Places

Scarves
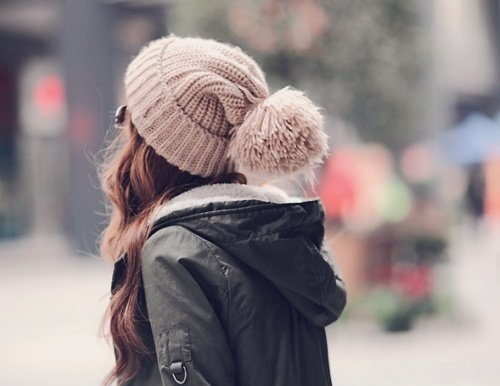
Hats
Fall Playlists

CANDLES

Cozyness
Photo Credits: Google Images
|
It’s sweater weather and you know what that means! Oversized sweaters, cute beanies, cozydays, crunchy colourful leaves, etc. Who wouldn't be excited for that. So today i'm going to share my autumn playlist. Just so you know some if not a lot of this music won't be from 2015 its just what i'll be listening to. In case you don't notice my fall playlist is really alternative for some reason. I hope you enjoy! ♥
|
Why you only call me when you're high - The Arctic Monkeys (Favourite band by the way)
Lessons in love - Neon Trees
Fever - Black Keys
Knee Socks - The Arctic Monkeys
Love me Again- John Newman
Riptide- Vance Joy
Come a Little Closer - Cage the Elephant
Cigarette Day Dreams - Cage the Elephant
Hungry Like The Wolf- Duran Duran
Just My Type - Saint Motel
Female robbery - The Neighbourhood
Everybody Talks- The Neon Trees
More than just a dream - Fitz and the Tantrums
My Head Is An Animal - Of Monsters and Men
Arabella - Arctic Monkeys
The Walker - Fitz and the Tantrums
♥♥♥

 There is a new trend! And I have noticed it especially in big cities. Guys, this isn't just a normal trend this is a throw back trend! The Stan Smith Shoe is making a huge comeback. This shoe appeared in the 1960s and became extremely popular in the 1980s selling around 22 million pairs. In 2012 the shoe stopped being sold despite how popular it was. In 2014 it came back and now I've seen so many people (both guys and girls!) rocking their street style with the Adidas Stan Smith shoes. Recently I got a pair and it is one of the most comfortable pair of shoes I have ever owned! I am obsessed!
Fashion Tip: Pair them with rolled up jeans or with a graphic midi skirt. Both looks look amazing!
Fashion Tip: Pair them with rolled up jeans or with a graphic midi skirt. Both looks look amazing!
Disclaimer: none of these pictures are mine!!
To be honest Iv'e never been more exited for workout clothes since now. It has become so fashionable and trendy. So down below I just compiled a little group of pictures I found on the internet that show the latest sport trends. These outfits are sooo cute! If it wasn't obvious already it's really in style to mix a neon pop of colour to a monochromatic outfit that uses black, white, or gray.


And in case you need motivation I've got you covered ;)


A lot of people ask me what I use on my hair to make it soft, smooth, smell good or long. Sorry to break it to you but to make it long you need patience
and time haha. My hair is naturally smooth/ soft because it's straight but I have noticed that some products help it become even softer or smoother. So I'm going to make this post to answer all those questions.
I wash my hair about every two to three days because I don't want to over dry it but it depends on your hair type. I use herbal essences shampoo and apply conditioner every time. When I started using this shampoo and conditioner I noticed a lot of differences. First off I noticed my hair looked overall better, shiny, smooth, etc. It was also one of those shampoos that leave your hair smelling REALLY good (unlike some that just smell when out of the bottle and after you rinse your hair it doesn't smell like anything.) My secret to make my hair feel really soft is too apply conditioner and not just leave it there, I massage it in and play with it for two minutes before rinsing. I am in love with herbal essences and STRONGLY recommend it. I use herbal essences for long hair, volume, and the one for smoothness.
I like to let my hair air dry when I can and try to avoid heat because it's not the best thing for your hair. but if you do use heat always wear heat protection! I also don't dye it because I don't need too and i don't want to damage it.
Try brushing your hair when it's dry because it will break easily if you comb it when wet. I brush my hair very THOROUGHLY and that helps it look shinier, smoother, and straighter. But don't overdo it because it can damage hair and make it end up looking dull. I often wear my hair up so the elastics give me a lot of flyaways by breaking my hair so to calm those down I use tigi bed head after party.
When I wear my hair up in a sleek hairstyle all my annoying baby hairs show so I use hair spray but too much hairspray can easily become a sticky mess or make your hair look like a wet rock, lol. So my trick is get a new toothbrush spray it with hairspray and comb the baby hairs, it works amazing and looks natural.
|
I usually feel uneasy when trying out a new product because I don't know if it actually works or if it will make my skin break out. Sometimes when I read things about the product I don't know if I should even believe it. If you guys are like me I hope you feel more comfortable knowing I have no reason to lie and I just want to help another teen out. I want to start off by saying that I am not one of those teenagers who suffer from severe acne, I just have breakouts here and there. When I do get pimples though, they last a long time. A couple days ago I got a cream called 'Clean and Clear Advantage Acne Spot Treatment' and I thought why not do a review?
Daily Observations:
Day 1:
I put on the cream last night. It claims that 100% of people noticed results on the first use. I'm not going to argue even though the effects were very minor. My spots slightly dried up.
Day 2:
I did notice that the bright red zits are know light pink and almost blend in with my skin. The pimples dried up a bit more.
Day 3:
Wooops! I lost the cream tube! lol sorry about that..
Day 4:
I found it! My acne completely dried up and it blends in pretty well with my skin.
Day 5:
My pimples now just look like spots a shade darker than my skin.
Day 6:
They're almost gone!
Day 7:
All my zits are basically gone although my skin isn't completely smooth.
Day 8:
My skin is clear unless you look really closely.
Day 9:
Same as day eight.
Day 10:
My skin is clear! There is still uneven colour in my fave.
Day 11:
My skin is clear!
Would I recommend this?
Hell yeah!
Final Thoughts:
I loved this product so much! It was very effective and i'm extremely satisfied with the result. I think this is one of the few items I will completely go through. I will definitely be re-buying this.
Hope this helped you guys! Please leave your thoughts below. :-)
I know it's the start of the fourth quarter and I should be saving these "back to school" DIY tutorials for the end of summer break but I couldn't help myself. I take so many notes, do work in them, and make a lot of schedules so naturally I go through them really fast. If you are like me and need to get many notebooks throughout the year this doesn't have to just be a beginning of the year DIY.

Over the weekend I went to get a notebook for school but couldn't find any ones I liked so then I had an idea, why not get a pack of plain ones which are much cheaper and decorate them! So I grabbed a cheap pack of plain spiral notebooks and rushed over to the section that had tapes. I already had some duct tape and washi tapes at home but I got three extra rolls that I liked. When I got home I got all the materials out and started working!
I chose the new tapes because its spring and the climates are getting warmer so I wanted colours that popped more. Since I chose greenish-bluish colours as my main background I chose the green notebook. The tape was a bit see through so I didn't want the colour of the notebook to affect the colour of the tape.
.jpg)
After deciding the pattern, you want to measure and cut the tape. I chose a horizontal pattern, plain tape then the patterned tape then plain tape again and so on. Remember to cut your tape longer than the actual cover so that you can bend it in and the edges/borders of your notebook look neater. After that I decided to add a vertical piece of patterned tape on the left side so that it would look more even, neat, and pretty.


I like to keep my notebook in the rings of my binder to stay organized so I poked a pencil ( it was the perfect size and had a sharp tip! ) through the the part where the hole was to open it up. Using the yellow tape I made a tag and with a pink sharpie wrote my name and "notes". Then I made a duct tape bow and taped it on the top of the tag. I didn't have time to fix up the inside so it looked very messy but if you want a perfect journal you can decorate that too.

I hope you guys enjoyed this fun and easy DIY!


.jpg)